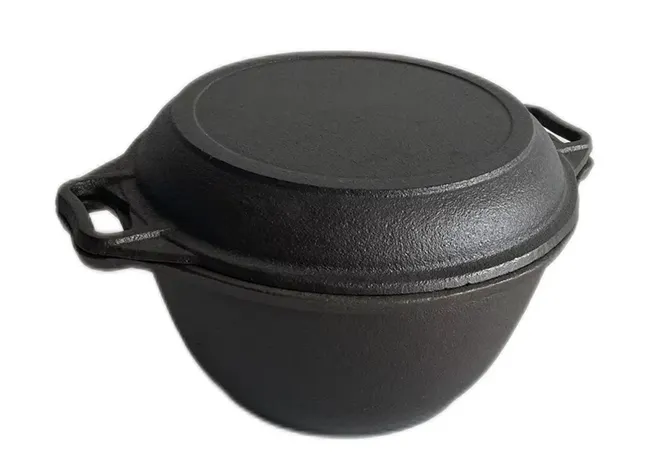
seasoning cast iron camp oven
Seasoning Your Cast Iron Camp Oven A Complete Guide
When it comes to outdoor cooking, nothing quite beats the versatility and durability of a cast iron camp oven. Whether you're simmering a hearty stew, baking bread, or roasting a chicken over an open flame, the cast iron camp oven provides even heat distribution and retains warmth beautifully. However, to ensure that your camp oven performs at its best, proper seasoning is crucial.
What is Seasoning?
Seasoning refers to the process of applying a layer of oil to the surface of your cast iron cookware. This not only helps to create a natural non-stick surface but also protects the metal from rust and corrosion. The seasoning process involves heating the oven to allow the oil to polymerize, essentially bonding it to the iron, creating a durable, non-stick surface.
Why is Seasoning Important?
1. Prevention of Rust Cast iron is prone to rust if not properly seasoned. A good layer of seasoning protects the metal from moisture, ensuring its longevity. 2. Non-Stick Surface Unlike modern non-stick cookware, a well-seasoned cast iron pot offers a natural non-stick surface, which is ideal for cooking various dishes without the risk of them sticking and burning.
3. Flavor Enhancement With each use, the seasoning enhances the flavors of your meals. The oil used in the seasoning process becomes infused with the flavors of your cooking, imparting a unique taste to every dish.
How to Season Your Cast Iron Camp Oven
Step 1 Clean the Oven Before seasoning, ensure your camp oven is clean. If you are starting with a new cast iron oven, wash it with warm, soapy water to remove any factory residues. For older ovens that may have rust or built-up residues, scrub them with steel wool or a coarse brush.
seasoning cast iron camp oven

Step 2 Dry Thoroughly After washing, dry your camp oven thoroughly. Any moisture left on the surface can lead to rust. You can place it on low heat on the stovetop or in an oven for a few minutes to ensure it's completely dry.
Step 3 Apply Oil Choose an oil with a high smoke point, such as flaxseed oil, vegetable oil, or canola oil. Use a paper towel or cloth to apply a thin, even layer of oil on the interior and exterior surfaces of the oven. Be sure to cover all surfaces, including the lid.
Step 4 Bake the Seasoning Preheat your oven to around 375°F (190°C). Place a large baking sheet or some aluminum foil on the bottom rack to catch any drips. Place the oiled camp oven upside down on the middle rack to allow air circulation. Bake for one hour.
Step 5 Cool Down After an hour, turn off the oven and allow the camp oven to cool inside the oven without opening the door. This gradual cooling helps to further bond the seasoning to the cast iron.
Maintaining Your Seasoned Oven
To maintain your newly seasoned camp oven
- Clean Gently After each use, clean it with hot water and a soft brush or sponge. Avoid soap, as it can strip the seasoning. - Reapply Oil After cleaning, dry the oven thoroughly and apply a light layer of oil before storing it. - Store Properly Keep the camp oven in a dry place. If stacking with other cookware, place a paper towel inside to absorb moisture and prevent scratches.
Conclusion
Seasoning your cast iron camp oven is essential for ensuring longevity, enhancing flavor, and maintaining a non-stick surface. With just a few steps, you can create a beautifully seasoned piece of cookware that will provide delicious meals for years to come. Embrace the tradition of cast iron cooking, and enjoy the unique flavors and experiences it brings to your outdoor culinary adventures!
-
Season Cast Iron Perfectly with GPT-4 Turbo TipsNewsAug.01,2025
-
High Quality Cast Iron Cookware - Baixiang County Zhongda MachineryNewsAug.01,2025
-
Premium Cast Iron Pan: Durable & Perfect HeatNewsAug.01,2025
-
High Quality Kitchen Durable Black Round Cast Iron Cookware Pancake Crepe Pan-Baixiang County Zhongda Machinery Manufacturing Co., Ltd.NewsAug.01,2025
-
Cast Iron Cookware - Baixiang County Zhongda Machinery | Nonstick, Heat ResistanceNewsAug.01,2025
-
High Quality Kitchen Durable Black Round Cast Iron Cookware - Baixiang County Zhongda Machinery | Non-Stick, Heat Retention, DurableNewsJul.31,2025


