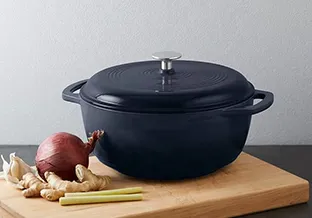
resurfacing cast iron skillet
Resurfacing a Cast Iron Skillet A Step-by-Step Guide
Cast iron skillets are renowned for their durability, heat retention, and ability to create a non-stick surface when seasoned properly. However, over time, even the best-loved skillets can lose their seasoning and develop rust, scratches, or a rough surface. Resurfacing a cast iron skillet might sound daunting, but with the right techniques and materials, you can restore your skillet to its former glory. This article will guide you through the process of resurfacing a cast iron skillet, ensuring it remains a staple in your kitchen for years to come.
Assessing the Skillet's Condition
Before you begin the resurfacing process, carefully examine your cast iron skillet. Look for any signs of rust, deep scratches, or flaking seasoning. If the skillet has only minor imperfections and some oxidation, you might be able to address these with a simple cleaning and re-seasoning. However, in more severe cases, resurfacing may involve more labor-intensive steps.
Materials You Will Need
- Steel wool or a scrub pad - Dish soap - A sponge or cloth - Vegetable oil or flaxseed oil (for seasoning) - An oven - Baking soda (optional for rust removal) - A fine-grit sandpaper (optional for heavy rust)
Step 1 Cleaning the Skillet
Start by cleaning the skillet thoroughly. Using steel wool or a scrub pad, apply a small amount of dish soap and scrub the entire surface of the skillet. This helps to remove grease, old seasoning, and any food residue that may have built up. If your skillet has rust spots, you can sprinkle a bit of baking soda on those areas to help lift the rust. After scrubbing, rinse the skillet under warm water and dry it completely with a clean cloth.
Step 2 Removing Rust and Scratches
If your skillet is heavily rusted or has deep scratches, you may need to resort to sandpaper for additional smoothing. Using fine-grit sandpaper, gently sand down the rusty areas or scratches, following the original grain of the cast iron. Be careful not to remove too much material; you just want to smooth the surface. Once satisfied, repeat the cleaning process to remove any sanding dust.
resurfacing cast iron skillet

Step 3 Seasoning the Skillet
After thoroughly cleaning the skillet, it's time to re-season it. Proper seasoning creates a natural non-stick surface while protecting the skillet against rust. To season
1. Preheat your oven to 450°F (232°C). 2. Apply a thin layer of vegetable or flaxseed oil to the entire surface of the skillet, including the handle and bottom. Use a paper towel to spread the oil evenly and wipe off any excess. 3. Place the skillet upside down on the oven's middle rack to prevent oil pooling inside. 4. Bake the skillet for one hour, allowing the oil to polymerize and create a solid seasoning layer. 5. Once the hour is up, turn off the oven and let the skillet cool down slowly inside.
Step 4 Final Touches
After cooling, your cast iron skillet should have a smooth, shiny finish, free from rust and ready for use. Perform a final inspection to ensure no areas were missed during cleaning or seasoning. If the surface feels rough or uneven, consider repeating the seasoning process once or twice more for a better outcome.
Maintenance Tips
To keep your cast iron skillet in top form, follow some simple maintenance practices
- Clean the skillet after each use with warm water and a sponge; avoid soap if you can. - Dry the skillet immediately to prevent rust formation. - Apply a thin layer of oil after drying to maintain seasoning. - Store the skillet in a dry place with the lid off, if applicable, to allow air circulation.
In conclusion, resurfacing a cast iron skillet may take some time, but the results are well worth the effort. This timeless kitchen tool, once restored and properly maintained, can provide you with delicious meals for generations to come. Whether you're frying, baking, or searing, a well-cared-for cast iron skillet is an indispensable asset in any home cook's kitchen. So roll up your sleeves and bring your skillet back to life!
-
Season Cast Iron Perfectly with GPT-4 Turbo TipsNewsAug.01,2025
-
High Quality Cast Iron Cookware - Baixiang County Zhongda MachineryNewsAug.01,2025
-
Premium Cast Iron Pan: Durable & Perfect HeatNewsAug.01,2025
-
High Quality Kitchen Durable Black Round Cast Iron Cookware Pancake Crepe Pan-Baixiang County Zhongda Machinery Manufacturing Co., Ltd.NewsAug.01,2025
-
Cast Iron Cookware - Baixiang County Zhongda Machinery | Nonstick, Heat ResistanceNewsAug.01,2025
-
High Quality Kitchen Durable Black Round Cast Iron Cookware - Baixiang County Zhongda Machinery | Non-Stick, Heat Retention, DurableNewsJul.31,2025


