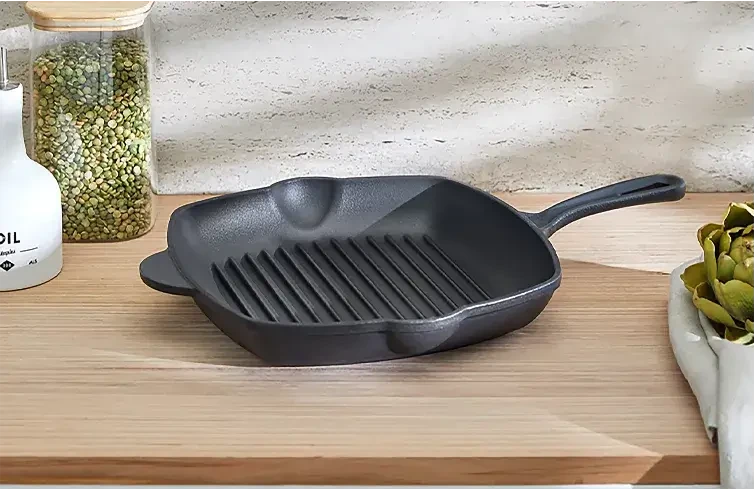
refurbishing cast iron skillet
Refurbishing a Cast Iron Skillet A Step-by-Step Guide
Cast iron skillets are cherished by many home cooks for their durability, heat retention, and ability to develop a non-stick surface over time. However, they can fall into disrepair if not properly cared for. If you've inherited an old cast iron skillet or found one at a garage sale that's seen better days, fear not! Refurbishing it is a straightforward process that can restore it to its former glory. Here’s how to breathe new life into your seasoned skillet.
Step 1 Assess the Condition
Before diving into the refurbishment, take a close look at your skillet. Check for rust, chips, and any significant flaking of the seasoning. If there are only minor rust spots and no major damage, you're in good shape. Your objective is to restore the skillet’s surface without compromising its integrity.
Step 2 Cleaning the Skillet
Start the refurbishment process by thoroughly cleaning your skillet. If your skillet is covered in layers of old seasoning or rust, it's best to remove them first. You can use a combination of methods
- Scouring Pad or Steel Wool For light rust spots, a good scrub with a scouring pad or fine steel wool can suffice. If the skillet is heavily rusted, you may need to apply more pressure, but be cautious not to strip the unblemished surface underneath.
- Vinegar Solution For stubborn rust, immerse the skillet in a solution of equal parts vinegar and water for a few hours. This will help dissolve the rust. After soaking, scrub with a steel wool pad, then rinse thoroughly with water.
- Oven Cleaner If grease and old seasoning are caked on, applying an oven cleaner can be effective. Spray it on, cover the skillet with plastic wrap, and let it sit for several hours before scrubbing.
After cleaning, ensure to dry your skillet completely to prevent new rust from forming
. Dry it on the stove over low heat to ensure there’s no moisture left.Step 3 Re-Seasoning the Skillet
refurbishing cast iron skillet

Once your skillet is clean and dry, it's time to re-season it. This process creates a beautiful, non-stick surface that will enhance cooking.
1. Choose the Right Oil Use oils with a high smoke point, such as flaxseed oil, canola oil, or grapeseed oil. Flaxseed oil is well-regarded for creating an effective non-stick surface.
2. Apply a Thin Layer Pour a small amount of oil onto the skillet and use a cloth or paper towel to spread it evenly over the entire surface, inside and out. It’s crucial to wipe away excess oil to prevent a sticky finish.
3. Bake the Skillet Preheat your oven to 375°F (190°C). Place the skillet upside down on the top rack of the oven (place a baking sheet on the lower rack to catch any drips). Bake for an hour and then turn off the oven, allowing the skillet to cool inside. This step will help the oil bond with the cast iron, creating the seasoning layer.
Step 4 Maintenance Tips
Now that your cast iron skillet is revitalized, maintaining it is essential to keep it in good shape.
- Avoid Soaking Never soak your skillet or put it in the dishwasher, as this can strip its seasoning.
- Use Minimal Soap A little bit of soap is okay if necessary, but most of the time, hot water and a gentle scrub will do the trick.
- Store Properly Ensure your skillet is completely dry, and store it in a dry place. You can place a paper towel inside to absorb moisture.
Refurbishing a cast iron skillet is not only a rewarding project but also a way to preserve a valuable cooking tool for generations. With proper care and maintenance, your refurbished skillet can be the centerpiece of delicious meals for years to come. So roll up your sleeves and turn that neglected piece of cookware into a kitchen star!
-
Season Cast Iron Perfectly with GPT-4 Turbo TipsNewsAug.01,2025
-
High Quality Cast Iron Cookware - Baixiang County Zhongda MachineryNewsAug.01,2025
-
Premium Cast Iron Pan: Durable & Perfect HeatNewsAug.01,2025
-
High Quality Kitchen Durable Black Round Cast Iron Cookware Pancake Crepe Pan-Baixiang County Zhongda Machinery Manufacturing Co., Ltd.NewsAug.01,2025
-
Cast Iron Cookware - Baixiang County Zhongda Machinery | Nonstick, Heat ResistanceNewsAug.01,2025
-
High Quality Kitchen Durable Black Round Cast Iron Cookware - Baixiang County Zhongda Machinery | Non-Stick, Heat Retention, DurableNewsJul.31,2025


