Reviving Your Cast Iron Frying Pan Through Effective Reconditioning Techniques
Reconditioning Cast Iron Frying Pans A Step-by-Step Guide
Cast iron frying pans are beloved kitchen tools known for their durability, heat retention, and versatility. Over time, however, they can develop rust, stuck-on residue, and a diminishing non-stick surface. Fortunately, reconditioning your cast iron frying pan is a rewarding process that can restore its original glory, allowing you to enjoy years of cooking with this timeless cookware. Below, we outline a straightforward guide to help you recondition your cast iron frying pan.
Understanding the Importance of Reconditioning
Reconditioning is essential to maintain the functionality of your cast iron frying pan. Cast iron cookware, when well-cared for, can last indefinitely. However, it requires regular maintenance to prevent rust and to develop a well-seasoned surface. A seasoned frying pan has a patina of oil or fat that forms a natural non-stick surface while providing added protection from moisture.
What You’ll Need
Before you begin the reconditioning process, gather the following supplies
- A stiff brush or scouring pad. - Mild dish soap (optional). - Drying cloths or paper towels. - Cooking oil (flaxseed oil, vegetable oil, or shortening). - An oven or stovetop for seasoning.
Step 1 Clean the Pan
The first step in reconditioning your cast iron frying pan is to clean it thoroughly. Use a stiff brush or scouring pad to scrub off any rust or stuck-on food. If your pan is heavily soiled, you might need to use a little mild dish soap, which is generally acceptable for occasional use. After scrubbing, rinse the pan with water and dry it immediately with a cloth or paper towel to prevent moisture from causing rust.
Step 2 Restore the Seasoning
Once your pan is clean and dry, it’s time to restore its seasoning. Preheat your oven to 450°F (232°C). Apply a thin layer of cooking oil to the entire surface of the pan, including the handle and exterior. It's crucial not to apply too much oil, as excessive oil can lead to a sticky residue instead of a smooth finish. Wipe off any excess with a cloth, leaving only a very light coat.
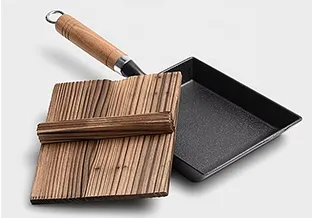
reconditioning cast iron frying pan

Step 3 Bake the Pan
Place the pan upside down in the oven to catch any drips, and bake it for about one hour. This process allows the oil to bond with the cast iron, creating a durable non-stick surface. After the hour is up, turn off the oven and let the pan cool inside. This gradual cooling process helps to set the seasoning better.
Step 4 Repeat if Necessary
Depending on the condition of your frying pan, you might want to repeat the seasoning process a few times. More layers of seasoning result in a better non-stick surface and improved protection against rust.
Maintaining Your Reconditioned Pan
To keep your cast iron frying pan in excellent condition after reconditioning, follow these maintenance tips
1. Avoid Soap Unless necessary, avoid using soap when cleaning your pan. Instead, opt for hot water and a stiff brush.
2. Dry Immediately Always dry your cast iron pan immediately after washing to prevent rust.
3. Reapply Oil After each use, consider applying a light layer of cooking oil to keep the seasoning intact.
4. Store Properly Store your pan in a dry environment, and consider placing a paper towel inside to absorb moisture.
By following these steps, you can breathe new life into your cast iron frying pan, enabling it to serve you well for generations. A well-reconditioned pan not only enhances your cooking experience but also becomes a cherished part of your culinary history. So roll up your sleeves, and let’s get started on that reconditioning project today!
-
Premium Deep Cast Iron Pan – Versatile Enameled & Grill Options, Perfect for Frying and SaucesNewsJun.10,2025
-
Chipped Enamel Dutch Oven – Durable & Stylish Kitchen Essential for Even CookingNewsJun.10,2025
-
Best Cast Iron Cookware Set Sale Durable Pots & Woks DealsNewsJun.09,2025
-
Hanging Dutch Oven Oven Safe & Lid IncludedNewsJun.09,2025
-
16 Inch Dutch Oven - Heavy Duty Cast Iron for Large MealsNewsJun.09,2025
-
Premium Cast Iron Bacon Grill Press - Heavy-Duty & Even HeatingNewsJun.09,2025


