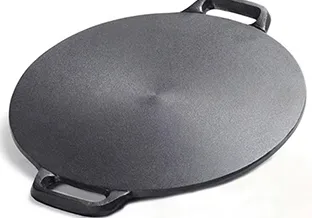
Essential Guide to Seasoning Your Cast Iron Grill for Best Performance
Seasoning Your Cast Iron Grill A Comprehensive Guide
Cast iron grills are celebrated for their durability and superior heat retention, making them a popular choice for grilling enthusiasts. However, to maximize the potential of your cast iron grill and to ensure that your food comes out perfectly every time, you need to properly season it. Seasoning your cast iron grill not only creates a non-stick surface for cooking but also protects the grill from rust and enhances the flavor of the food. In this article, we explore the steps and tips for effectively seasoning your cast iron grill.
What is Seasoning?
Seasoning is the process of applying a layer of fat or oil to the surface of cast iron cookware, which then bonds to the metal through a process called polymerization. This creates a protective, non-stick coating for the grill surface. When done properly, seasoning not only prevents food from sticking but also adds a unique, rich flavor to your dishes.
Choosing the Right Oil
The type of oil you use for seasoning your cast iron grill is crucial. Ideally, you should choose an oil with a high smoke point, as this will allow the oil to polymerize effectively. Common choices include vegetable oil, flaxseed oil, grapeseed oil, and canola oil. While each of these oils has its benefits, flaxseed oil is often recommended for its ability to create a hard, durable coating.
Steps to Season Your Cast Iron Grill
1. Clean the Grill Before seasoning, ensure that your grill is clean. If it’s new, wash it with warm, soapy water to remove any factory residue. For a used grill, scrub away any rust or leftover food particles. Rinse thoroughly and dry completely to avoid introducing moisture.
cast iron grill seasoning

2. Apply Oil Once the grill is clean and dry, apply a thin layer of your chosen oil using a clean cloth or paper towel. Be sure to cover all surfaces, including the grates, inside and out. The key is to use a thin layer; too much oil can lead to a sticky surface rather than a smooth, non-stick finish.
3. Heat the Grill Preheat your grill to a high temperature, ideally around 375°F to 450°F. You can either place it on direct heat outdoors or place it in an oven. Heating allows the oil to reach its smoke point, enabling the polymerization process, which will bond the oil to the iron.
4. Bake It In Allow the grill to heat for about an hour. This process will emit smoke, so ensure you have good ventilation. After an hour, turn off the heat and let the grill cool down completely before removing it.
5. Repeat the Process For optimal results, repeat the oil application and heating process 2-3 times. Multiple layers will create a stronger non-stick surface and greater protection against rust.
Maintenance and Care
After seasoning your cast iron grill, it is essential to maintain it properly. Avoid using soap when cleaning; instead, use a brush and hot water to remove food residues. If food begins to stick, you can reseason the grill as needed. Regular maintenance will prolong the life of your grill, ensuring that it remains a staple in your cooking routine.
Conclusion
Seasoning your cast iron grill is a vital practice that enhances its performance and longevity. By choosing the right oil, properly applying and heating it, and maintaining the grill with care, you can enjoy perfectly grilled meals while preserving the unique flavor that cast iron provides. Whether you are grilling vegetables or savoring a perfectly seared steak, a well-seasoned cast iron grill will undoubtedly elevate your culinary experience. Happy grilling!
-
Season Cast Iron Perfectly with GPT-4 Turbo TipsNewsAug.01,2025
-
High Quality Cast Iron Cookware - Baixiang County Zhongda MachineryNewsAug.01,2025
-
Premium Cast Iron Pan: Durable & Perfect HeatNewsAug.01,2025
-
High Quality Kitchen Durable Black Round Cast Iron Cookware Pancake Crepe Pan-Baixiang County Zhongda Machinery Manufacturing Co., Ltd.NewsAug.01,2025
-
Cast Iron Cookware - Baixiang County Zhongda Machinery | Nonstick, Heat ResistanceNewsAug.01,2025
-
High Quality Kitchen Durable Black Round Cast Iron Cookware - Baixiang County Zhongda Machinery | Non-Stick, Heat Retention, DurableNewsJul.31,2025


