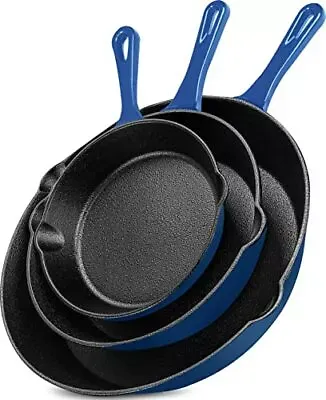
cast iron dutch oven for bread
Baking Bread in a Cast Iron Dutch Oven
Baking bread at home has seen a resurgence in popularity, and for good reason. The satisfaction of pulling a freshly baked loaf from the oven is unmatched, and the aroma of baking bread fills the home with warmth and comfort. One of the best tools for achieving bakery-quality results is the cast iron Dutch oven. This simple yet versatile kitchen equipment can transform your bread-making experience, yielding crusty loaves with a beautiful rise and tender crumb.
Why Choose a Cast Iron Dutch Oven?
Cast iron Dutch ovens are beloved by home bakers for several reasons. Firstly, they retain and evenly distribute heat, which is essential for creating the ideal baking environment. When you place a dough in a hot Dutch oven, the enclosed space acts like a steam oven. The steam created by the dough's moisture helps to keep the crust soft for the first few minutes of baking, allowing the bread to rise fully and develop a crispy, golden crust.
Moreover, the heavy lid of a Dutch oven traps moisture, which further enhances the bread's texture. Many bakers find that using a Dutch oven results in a superior crust compared to baking on a flat surface or in a standard loaf pan. The result is a hearty, artisan-style loaf that rivals anything you would find in a bakery.
Getting Started with Your Dutch Oven
To start baking your bread, you will need a few key ingredients flour, water, yeast, and salt. The beauty of baking bread is that you can experiment with different types of flour, add herbs, seeds, or even nuts to customize your bread to your taste.
Here's a simple recipe for a no-knead artisan bread that can be baked in a cast iron Dutch oven
Ingredients - 3 cups all-purpose flour - 1 ½ teaspoons salt - ½ teaspoon instant yeast - 1 ½ cups warm water
Instructions
cast iron dutch oven for bread

1. Mix the dough In a large bowl, combine the flour, salt, and yeast. Add the warm water and stir until a rough dough forms. The mixture will be sticky and shaggy—this is normal.
2. Let it rise Cover the bowl with plastic wrap or a damp cloth, and let it sit at room temperature for 12 to 18 hours. The dough is ready when it has doubled in size and has bubbles on the surface.
3. Shape the dough After the initial rise, turn the dough out onto a well-floured surface. With floured hands, gently shape the dough into a ball, being careful not to deflate it too much. Let it rest for about 30 minutes while you preheat your oven.
4. Preheat your Dutch oven Place your cast iron Dutch oven (with the lid) in the oven and preheat it to 450°F (232°C). Preheating the Dutch oven is crucial for creating that perfect crust.
5. Bake the bread Once the oven is hot, carefully remove the Dutch oven (using oven mitts!) and remove the lid. Place the shaped dough into the pot—it’s okay if it doesn’t look perfect. Cover with the lid and bake for 30 minutes. Then, remove the lid and bake for an additional 15-20 minutes, until the bread is deeply golden brown.
6. Cool and enjoy Once baked, carefully remove the bread from the Dutch oven and let it cool on a wire rack for at least 30 minutes before slicing. This allows the crumb to set and enhances the flavor.
Tips for Success
- Experiment with flavors Don’t hesitate to mix it up by adding ingredients such as olives, cheese, or herbs for a unique twist. - Use a thermometer For best results, the internal temperature of the bread should reach about 200°F (93°C) when it’s perfectly baked. - Practice patience Good bread takes time. Allowing adequate fermentation improves flavor and texture, so try to resist the urge to rush the process.
In conclusion, baking bread in a cast iron Dutch oven is both an art and a science. With practice, you will master the technique and create beautiful, delicious loaves that will impress your family and friends. The joy that comes from baking your own bread is not just in the eating, but also in the process itself—so grab that Dutch oven and start baking today!
-
Season Cast Iron Perfectly with GPT-4 Turbo TipsNewsAug.01,2025
-
High Quality Cast Iron Cookware - Baixiang County Zhongda MachineryNewsAug.01,2025
-
Premium Cast Iron Pan: Durable & Perfect HeatNewsAug.01,2025
-
High Quality Kitchen Durable Black Round Cast Iron Cookware Pancake Crepe Pan-Baixiang County Zhongda Machinery Manufacturing Co., Ltd.NewsAug.01,2025
-
Cast Iron Cookware - Baixiang County Zhongda Machinery | Nonstick, Heat ResistanceNewsAug.01,2025
-
High Quality Kitchen Durable Black Round Cast Iron Cookware - Baixiang County Zhongda Machinery | Non-Stick, Heat Retention, DurableNewsJul.31,2025


