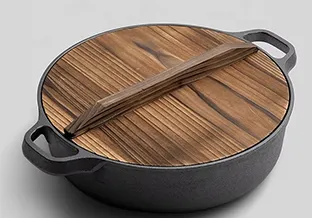
How to Bake Perfect Bread in an Oval Dutch Oven at Home
Baking Bread in an Oval Dutch Oven A Culinary Journey
Baking bread is an age-old tradition that transcends cultures and generations. It is a process that combines simple ingredients—flour, water, salt, and yeast—into a delightful loaf that can bring comfort and nourishment. One of the most effective vessels for achieving that perfect crust and tender crumb is the oval Dutch oven. This iconic kitchen tool not only serves aesthetic purposes but also enhances the baking process, leading to consistent and delicious results.
The Perfect Vessel
The oval Dutch oven is revered for its ability to simulate the conditions of a professional oven. Its heavy cast-iron construction retains heat well, ensuring an even distribution across the loaf. Unlike traditional baking techniques that may require multiple adjustments to temperature and baking time, the Dutch oven simplifies the process. The lid traps moisture, creating steam essential for the bread’s crust, while the consistent heat cooks the bread evenly.
Preparing the Dough
To start, choose a bread recipe that excites your palate—perhaps a rustic sourdough or a hearty whole wheat. The first step is mixing your ingredients. Start with high-quality flour, as this will significantly impact the final texture and flavor of the bread. If you're looking for more flavor, consider incorporating whole grains, seeds, or herbs.
Once the ingredients have been combined into a shaggy dough, allow it to rest. This process, known as autolyse, helps to develop gluten and results in a more elastic bread. After resting, knead the dough until it becomes smooth and elastic, usually about 10 minutes by hand or 5 minutes in a stand mixer.
The Rise
After kneading, place your dough in a lightly oiled bowl, cover it with a clean cloth, and let it rise until it has doubled in size—this could take anywhere from one to three hours, depending on the room temperature and the yeast used. This step is critical as it contributes to the bread’s flavor and texture.
For those who enjoy the complexity of sourdough bread, you might opt for a longer fermentation process, allowing the dough to rise slowly overnight in the fridge. This not only develops a more nuanced flavor profile but also makes handling the dough easier come morning.
baking bread in oval dutch oven

Preheating the Dutch Oven
While your dough is rising, preheat your oven along with the Dutch oven. Place the empty oval Dutch oven, with its lid, into the oven at around 450°F (232°C). It’s important to preheat the pot as this mimics the conditions of a traditional bread oven. The hot surface will create a burst of steam when the dough is added, contributing to the ideal crust.
Shaping and Scoring
Once your dough has risen, gently punch it down to release any excess gas and shape it into a round or oval loaf that fits your Dutch oven. Place it on a piece of parchment paper, and let it rest for another 30 minutes. Just before baking, make a few slashes on the surface of the dough with a sharp blade or lame. This scoring allows the bread to expand in the oven without tearing unpredictably.
Baking
Carefully remove the hot Dutch oven from the oven, lift the bread using the parchment paper, and place it inside. Cover with the lid and return it to the oven. Bake for about 30 minutes covered, then remove the lid to allow the crust to develop further. Depending on your desired doneness, you may want to bake it for an additional 10-15 minutes uncovered.
When the bread is a deep golden brown and sounds hollow when tapped on the bottom, it’s done. Remove it from the oven and let it cool on a wire rack. This cooling period is crucial as it allows the interior crumb structure to set properly.
Conclusion
Baking bread in an oval Dutch oven not only yields an exquisite loaf but can also be a therapeutic and rewarding experience. With patience and practice, you can master the art of bread baking right in your kitchen. Whether you’re an experienced baker or a novice, the satisfaction of slicing into a freshly baked loaf that you created is a joy worth pursuing. So gather your ingredients, heat your Dutch oven, and embark on this delightful baking adventure!
-
Season Cast Iron Perfectly with GPT-4 Turbo TipsNewsAug.01,2025
-
High Quality Cast Iron Cookware - Baixiang County Zhongda MachineryNewsAug.01,2025
-
Premium Cast Iron Pan: Durable & Perfect HeatNewsAug.01,2025
-
High Quality Kitchen Durable Black Round Cast Iron Cookware Pancake Crepe Pan-Baixiang County Zhongda Machinery Manufacturing Co., Ltd.NewsAug.01,2025
-
Cast Iron Cookware - Baixiang County Zhongda Machinery | Nonstick, Heat ResistanceNewsAug.01,2025
-
High Quality Kitchen Durable Black Round Cast Iron Cookware - Baixiang County Zhongda Machinery | Non-Stick, Heat Retention, DurableNewsJul.31,2025


