dutch oven for frying
Exploring the Art of Frying with a Dutch Oven
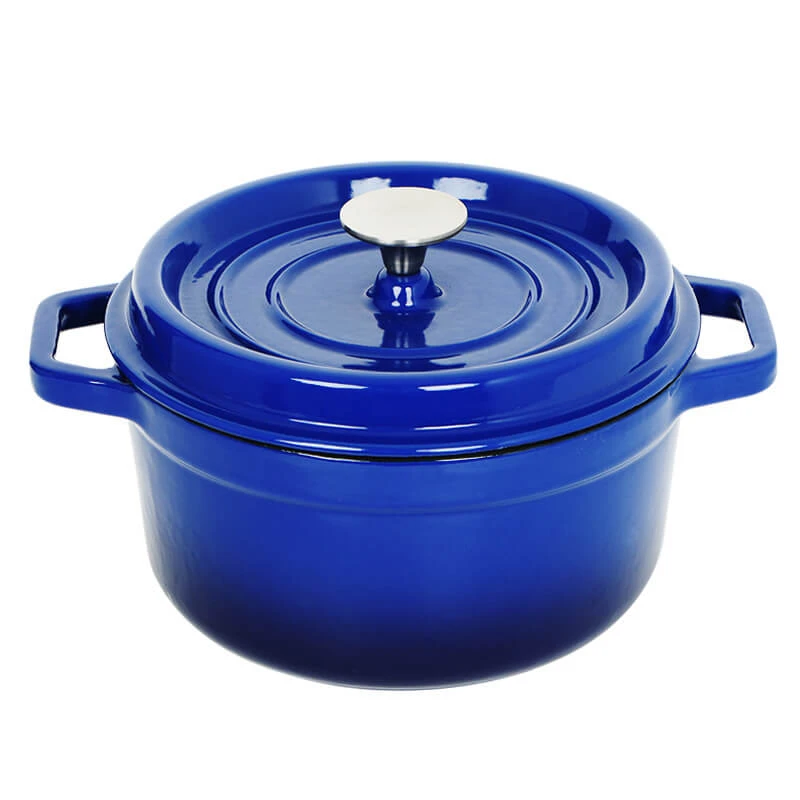
When it comes to versatile kitchen equipment, the Dutch oven reigns supreme. This timeless piece of cookware, known for its thick walls and heavy lid, is often associated with slow-cooking stews and braising meats. However, many are surprised to learn that a Dutch oven can also be an excellent tool for frying. In this article, we will explore the benefits and techniques of using a Dutch oven for frying, perfect for both novice cooks and seasoned chefs alike.
Why Use a Dutch Oven for Frying?
One of the primary reasons to choose a Dutch oven for frying is its ability to maintain a consistent temperature. The thick cast-iron material retains heat exceptionally well, preventing the temperature from fluctuating when food is added. This is crucial for frying, where maintaining the right temperature is key to achieving a golden-brown crust without undercooking or burning the food.
Moreover, the deep design of a Dutch oven allows for cooking larger quantities of food at once. Whether you’re frying chicken, doughnuts, or fritters, the ample depth reduces splatter and allows for even cooking. Unlike shallow pans, a Dutch oven can accommodate more oil, providing a better frying experience.
Preparing to Fry
Before you dive into frying with a Dutch oven, there are a few essential preparations to consider. First, ensure that your Dutch oven is clean and free from any residues from previous cooking. If your pot has a thick layer of seasoning or a non-stick interior, this is ideal for frying, as it can prevent food from sticking.
Next, choose the oil that best suits your frying needs. Oils with high smoke points, such as vegetable oil, canola oil, or peanut oil, are ideal for frying as they can withstand the high temperatures required without burning. Fill the Dutch oven with enough oil to submerge the food, but be careful not to overfill it—about halfway up the sides is generally a safe measure.
Technique The Frying Process
Once you’ve prepared your Dutch oven, it’s time to fry
. Here’s a step-by-step guidedutch oven for frying

1. Heat the Oil Place the Dutch oven on the stovetop over medium heat. Use a thermometer to monitor the oil temperature, aiming for around 350°F (175°C) for most frying.
2. Prepare the Food While the oil heats, coat your food in a batter, seasoning, or breadcrumbs as desired. This step is crucial for creating a crispy texture.
3. Test the Oil To ensure that the oil is hot enough, drop a small piece of bread or batter into the oil. If it bubbles vigorously and browns in about 60 seconds, the oil is ready.
4. Fry in Batches Gently place the food in the oil, taking care not to overcrowd the Dutch oven. Overcrowding can lower the oil temperature and result in soggy, greasy food. Fry in small batches, allowing for adequate space between pieces.
5. Monitor Cooking Time Cook the food until it reaches a golden-brown color, flipping it halfway through if necessary. Use a slotted spoon or tongs to remove the food and place it on a paper towel-lined plate to absorb excess oil.
Safety Considerations
Frying can pose safety risks, especially when using a pot filled with hot oil. Always keep a lid nearby to extinguish any unexpected flare-ups. Additionally, use a deep-fry thermometer to keep track of oil temperatures and prevent overheating. Finally, never leave the frying process unattended.
Conclusion
Frying with a Dutch oven not only harnesses the advantages of this robust cookware but also opens up a world of culinary possibilities. From crispy fried chicken to delectable beignets, the Dutch oven is an unsung hero in the frying game. With its ability to maintain temperature and accommodate plenty of oil, it’s perfect for both large gatherings and cozy family dinners. So, the next time you’re looking to indulge in some fried delights, don’t overlook your trusty Dutch oven—it just might become your favorite frying companion. Happy frying!
-
High Quality Kitchen Durable Black Round Cast Iron Cookware Pancake Crepe Pan-Baixiang County Zhongda Machinery Manufacturing Co., Ltd.|Durability,Non-Stick SurfaceNewsJul.22,2025
-
High Quality Cast Iron Cookware-Pan with Wooden Handle|Durable,Non-Stick,Even Heat DistributionNewsJul.21,2025
-
Cast Iron Pancake Crepe Pan-Durable Kitchenware|Non-Stick&Wooden HandleNewsJul.21,2025
-
Cast Iron Pancake Crepe Pan-Durable Kitchenware|Non-Stick&Wooden HandleNewsJul.21,2025
-
Cast Iron Pancake Crepe Pan-Durable Kitchenware|Non-Stick&Wooden HandleNewsJul.21,2025
-
Cast Iron Pancake Crepe Pan-Durable Kitchenware|Non-Stick&Wooden HandleNewsJul.21,2025